 support@greatamericancommunity.com


Relax with Yoga Breaths
Great American Home

Movies Every Night
Coming up on GAC Family

Danica's Complete Bible Journey
Great American Home

Trust in God's Plan
Great American Home

Christmas in July
Coming up on GAC Family

Star Studded Award Show with Danica
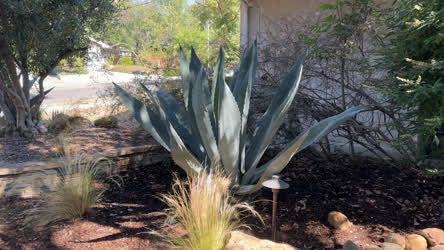
BIG Succulent Planting Mistake
Great American Home

Heart-Healthy Pasta
Great American Cookbook

2022 Animal Adoption Recap
Great American Pets

Health Bits: Danica's Go-To Snack
Great American Cookbook

Cold Weather Essentials for Pets

Dog Adoption: Lana
Great American Pets

A New Christmas Perspective
Great American Home

National K9 Veterans Day (Fred & Craig story)
Giving And Caring

Fall Into Winter
Coming up on GAC Family
Kindness Rocks Matter
Giving And Caring

Dog Adoption: Goji
Great American Pets

Installing Truck Storage
Great American Home

Love for the Military
Giving And Caring
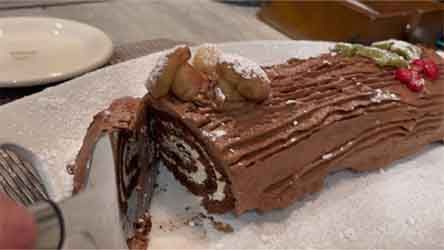
Holiday Yule Log
Great American Christmas
Pork Chili Verde
Great American Cookbook

Cream Cheese Pumpkin Pie
Great American Cookbook

DIY Santa Cookie Tray

DIY Pumpkin Beauty Sugar Scrub
Coming up on GAC Family
0 seconds of 0 secondsVolume 90%
Press shift question mark to access a list of keyboard shortcuts
Keyboard Shortcuts
Shortcuts Open/Close/ or ?
Play/PauseSPACE
Increase Volume↑
Decrease Volume↓
Seek Forward→
Seek Backward←
Captions On/Offc
Fullscreen/Exit Fullscreenf
Mute/Unmutem
Decrease Caption Size-
Increase Caption Size+ or =
Seek %0-9
Tulip Carrot Wreath

Tulip Carrot Wreath
Made to look like a snack for the Easter bunny himself, Rachel Van Kluyve’s Spring wreath is super cheery and surprisingly easy to make. Plus, when you use faux flowers you’ll be able to display the wreath year after year.
DIY Spring Flower Wreath
Rachel Van Kluyve
Supplies:
Orange floral of choice with long stems, Tulips
Greenery of Choice
Floral Wire
Wire cutters
Wire Ribbon
Zip Ties or Floral Tape
Directions:
1. Prep your florals. Some may need trimmed or removed from bushels depending on where you purchased them. Make sure your florals are longer stemmed because you are using the stem to adhere to the next set of florals.
2. Layer your first 8-10 florals together. Most importantly make sure your first tulip stands alone. Put down the first single floral and work down from there. The first floral will create the point of the carrot. From there layer and spread out your remaining 8 or so ad then adhere the stems together with a zip ties, floral wire, or tape. I found zip ties were easiest.
3. Continue with the next “set” by layering the same way you did in step 2 and adhere them them all together. You are essentially created a layered triangle. All created one stemmed base in the back. Once you’ve used all your florals or have 3-4 bushels zip tied, you are ready to work on your carrots top.
4. Tip: I flipped my wreath over and made sure the stems were secure and added a couple more zip ties to the back.
5. Add the greenery of your choose to the tops of the exposed stems. Don’t worry about the gap between the florals and green top. A ribbon will go here. I used floral tape to put my stem on top and then secured with a zip tie.
6. Create your Ribbon of choice. My ribbon specifications are below.
Cut five 24 inch pieces of ribbon
Cut one 10 inch piece of ribbon
Cut one 36 inch piece of ribbon
7. Put the five 24” inch pieces into circles and staple each of them into a circle creating a seam. You will have five circles once this is done.
8. Do the same with the 10 inch piece of ribbon, creating a circle and staple where the ends meet. Now you will have 6 circles.
9. Place the seamed and stapled side of one circle down on your table and place your finger in the middle of the ribbon mashing the circle down and pinch the top and bottom of the ribbon together creating a pinched center.
10. While keeping the ribbon tight repeat the process and do the same with the remaining four circles. You will then layer each circle on top of the other staggering them which will create a circle itself. Your five circles will be pinched and flattened on top of one another and secured with a zip tie at the center
11. Next, take the 10”piece of wire and put as the center point of your bow. Adhere with floral wire.
12. Adhere your final 36 inch ribbon centered on the back of the bow you just created to create the legs of the bow and trim according to how long you want them.
13. Once your bow is adhered to the wreath fluff each ribbon according to your taste and simply hang. I used a suction cup hook to place on my glass door or a command hook will work well.
Be sure to share your creations with me on my socials @crateandcottage
TV app


Mobile app


Connect with us :


Such a bright and happy idea! And so easy! Thank you for sharing!