 support@greatamericancommunity.com


Personalized Tea Towel Craft
Great American Home
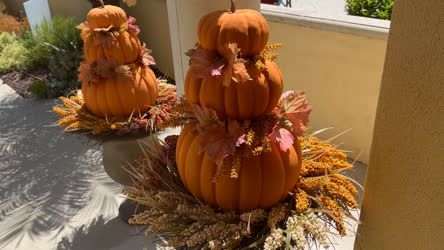
DIY Pumpkin Topiary
Great American Crafts

DIY Summer Serving Trays
Great American Crafts
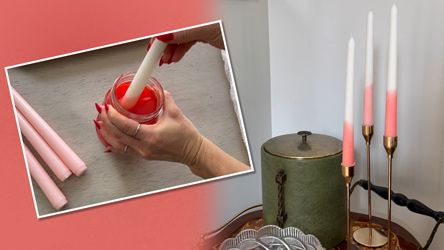
Dip Dyed Candles
Great American Crafts

Chocolate Easter Bark
Great American Cookbook
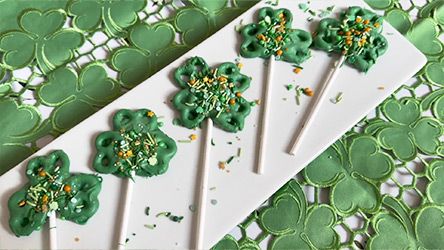
Shamrock Pretzel Pops
Great American Cookbook

DIY Pom Poms
Great American Crafts

Last-Minute King Cake
Great American Cookbook
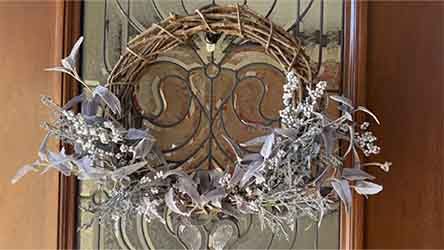
DIY Winter Wreath
Great American Crafts

DIY Valentine's Day Felt Bookmarks
Great American Home

DIY Balloon Backdrop
Great American Crafts

DIY Clay Magnets
Great American Home

DIY Bath Bombs
Great American Home

DIY Soap Making 101
Great American Home

New Year's Eve Crafts for Kids
Great American Home

Chicken Pot Pie Galette
Great American Cookbook

Feast of the Seven Fishes
Great American Cookbook

Christmas Green Beans
Great American Cookbook
DIY Tomato Cage Christmas Trees
Great American Home
0 seconds of 0 secondsVolume 90%
Press shift question mark to access a list of keyboard shortcuts
Keyboard Shortcuts
Shortcuts Open/Close/ or ?
Play/PauseSPACE
Increase Volume↑
Decrease Volume↓
Seek Forward→
Seek Backward←
Captions On/Offc
Fullscreen/Exit Fullscreenf
Mute/Unmutem
Decrease Caption Size-
Increase Caption Size+ or =
Seek %0-9
Back to School Photo Backdrop

Back to School Photo Backdrop
Maria Provenzano's DIY Back to School Backdrop is the perfect way to capture those special school moments.
Back To School Photo Backdrop
Maria Provenzano
Supplies:
felt sheets (yellow, pink, gray, tan, white, and black)
scissors
pencil
ruler
hot glue gun
adhesive letters
ribbon
permanent markers
Directions (for the “pencil”):
1. Cut a large rectangle out of the yellow foam sheet that is large enough to fit the letter to create the desired size. This will be the base for the pencil.
2. Create a jagged edge on one side of the yellow rectangle using scissors.
3. Cut a triangle out of the tan that will fit under the jagged edge.
4. Cut a smaller back triangle to fit on top of the tan triangle to crate the tip of the pencil.
5. Cut the pink foam sheet into a rectangle that fits over the size of the pencil to create the “eraser.”
6. Cut the gray into about a 1 inch wide strip that is as long as the width of the “pencil” and place it over the area where the yellow and pink meet.
7. Once everything is cut and the sizing is figured out, cut enough for each letter. Then, assemble the “pencils” together using hot glue and add the adhesive letters.
8. Create a banner but using the hot glue to add the “pencils” onto some ribbon.
Tip: Use a ruler and pencil to create precise lines to help make the outcome look clean and even.
Directions: (for the “paper”):
1. Cut the white felt sheet into a rectangle large enough to fit the adhesive letters desired.
2. Use a ruler and pencil to create the lines for the “paper.”
3. Go over the lines with a permanent marker using the ruler to aid in creating precise lines.
4. Add the adhesive letters to the center of the “paper.”
5. Use a glue gun to add the letters to a ribbon to create a banner.
Comments 
Add comment...
TV app


Mobile app


Connect with us :


