 support@greatamericancommunity.com


Relax with Yoga Breaths
Great American Home

Movies Every Night
Coming up on GAC Family

Danica's Complete Bible Journey
Great American Home

Trust in God's Plan
Great American Home
BIG Succulent Planting Mistake
Great American Home

Christmas in July
Coming up on GAC Family

Star Studded Award Show with Danica

2022 Animal Adoption Recap
Great American Pets

Heart-Healthy Pasta
Great American Cookbook
Dog Adoption: Lana
Great American Pets

Cold Weather Essentials for Pets

Health Bits: Danica's Go-To Snack
Great American Cookbook

National K9 Veterans Day (Fred & Craig story)
Giving And Caring

A New Christmas Perspective
Great American Home

Installing Truck Storage
Great American Home
Kindness Rocks Matter
Giving And Caring

Dog Adoption: Goji
Great American Pets

Fall Into Winter
Coming up on GAC Family

Love for the Military
Giving And Caring
Pork Chili Verde
Great American Cookbook
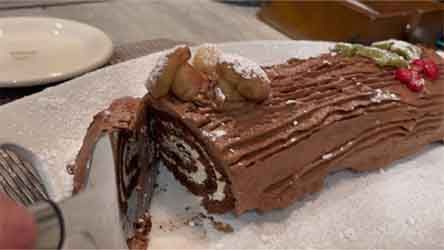
Holiday Yule Log
Great American Christmas
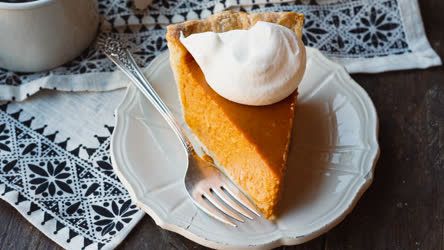
Cream Cheese Pumpkin Pie
Great American Cookbook

DIY Santa Cookie Tray

DIY Pumpkin Beauty Sugar Scrub
Coming up on GAC Family
0 seconds of 0 secondsVolume 90%
Press shift question mark to access a list of keyboard shortcuts
Keyboard Shortcuts
Shortcuts Open/Close/ or ?
Play/PauseSPACE
Increase Volume↑
Decrease Volume↓
Seek Forward→
Seek Backward←
Captions On/Offc
Fullscreen/Exit Fullscreenf
Mute/Unmutem
Decrease Caption Size-
Increase Caption Size+ or =
Seek %0-9
DIY Easter Candy Vase

DIY Easter Candy Vase
If you're hosting an Easter or Spring celebration, lifestyle expert Rachel Van Kluyve's sweet candy vase centerpiece is guaranteed to brighten up your table.
DIY Easter Candy Vase
Rachel Van Kluyve
Materials:
Vase
Insert for vase
Candy of choice
Flower of choice
Directions:
1. First figure out what size vase you are using so that then you can figure out what size insert you need. The insert should be just below the rim of your vase and should be smaller than your actual vase. It should leave you, once inserted, with a 1/2 inch to an inch gap between the outside of the vase and the new one you placed inside.
2. Once your insert is set, start laying your candy. You can use multiple options for this Easter theme vase, I chose peeps, jellybeans, and malt robin eggs.
3. Continue layering each candy row until your vase is full.
4. Insert your flowers of choice into the center and enjoy!
Don’t forget this vase can be reused and the candy can be interchangeable and used for any holiday. Think peppermints for Christmas or candy corn for Halloween!
Comments 
Add comment...
TV app


Mobile app


Connect with us :


