 support@greatamericancommunity.com


Relax with Yoga Breaths
Great American Home

Movies Every Night
Coming up on GAC Family

Danica's Complete Bible Journey
Great American Home

Trust in God's Plan
Great American Home

2022 Animal Adoption Recap
Great American Pets

Christmas in July
Coming up on GAC Family

Star Studded Award Show with Danica
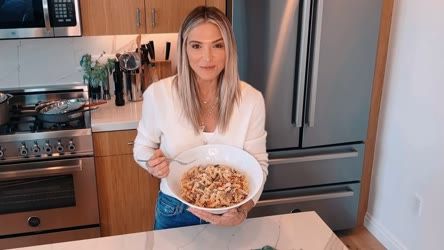
Heart-Healthy Pasta
Great American Cookbook
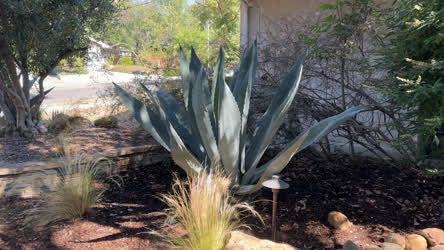
BIG Succulent Planting Mistake
Great American Home

Cold Weather Essentials for Pets

Health Bits: Danica's Go-To Snack
Great American Cookbook
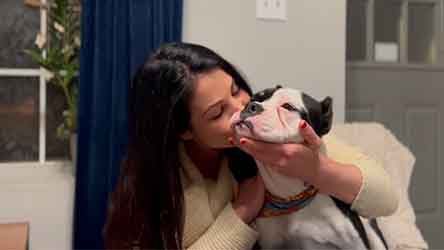
Dog Adoption: Lana
Great American Pets

National K9 Veterans Day (Fred & Craig story)
Giving And Caring

A New Christmas Perspective
Great American Home

Installing Truck Storage
Great American Home
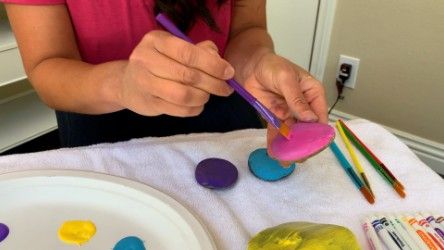
Kindness Rocks Matter
Giving And Caring

Dog Adoption: Goji
Great American Pets

Fall Into Winter
Coming up on GAC Family

Love for the Military
Giving And Caring
Cream Cheese Pumpkin Pie
Great American Cookbook
Pork Chili Verde
Great American Cookbook
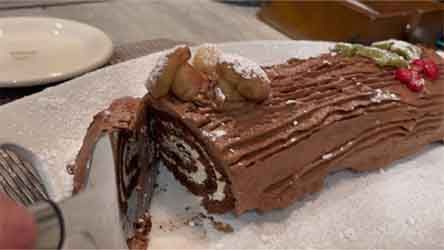
Holiday Yule Log
Great American Christmas

DIY Santa Cookie Tray

DIY Pumpkin Beauty Sugar Scrub
Coming up on GAC Family
0 seconds of 0 secondsVolume 90%
Press shift question mark to access a list of keyboard shortcuts
Keyboard Shortcuts
Shortcuts Open/Close/ or ?
Play/PauseSPACE
Increase Volume↑
Decrease Volume↓
Seek Forward→
Seek Backward←
Captions On/Offc
Fullscreen/Exit Fullscreenf
Mute/Unmutem
Decrease Caption Size-
Increase Caption Size+ or =
Seek %0-9
DIY Valentine's Day Candy Board

DIY Valentine's Day Candy Board
Get ready to fall in love! Meet the creator of Crate and Cottage, Rachel Van Kluyve, and see how to make an epic candy board that's perfect for Valentine's Day!
Great American Community
DIY Valentines Charcuterie Board
Welcome friends. I am Rachel Van Kluyve from Nashville, TN mom of four, married to my high school sweetheart, business owner, author, and content creator, and today I’m so happy to be joining the great American community today. I’m happy to introduce myself and my family to you all and share a fun family friendly diy you can do at home for Valentine’s Day.
So, as most of you know, charcuterie boards are very popular. We ourselves have them at almost every entertaining event that we host. Charcuterie boards as you may know were used to originally display meats and cheese but can take on many food themes like fruit, buttery spreads, and even desert boards, which is what we’re creating today.
So for this particular DIY, I’m employing, my husband Richard, because our businesses revolve around the work that we do together particularly diys and building homes, and hey, why not do a fun couples diy for valentines? Fun fact Richard and I have been together since we were 15 and 18. We met at church and have never looked back. So as an ode to love today we are making our own valentines charcuterie.
Charcuterie boards can truly be anything with a flat surface. I have seen butcher block, chunks of granite, even large picture frames used to display amazing food boards. Sure, a lot of stores sell beautiful charcuterie boards, but today I wanted to show you a few examples of what you can make yourself affordably by thinking outside of the box. I found these simple boards at a local Craft store and wanted to share with you two examples and styles of DIY boards.
For my particular tray, I was drawn to this piece of wood that I found at the craft store already cut out with a beautiful bark details on the sides. I also found this round pre-cut board that we will do something fun with as well. I definitely want you to simply see there are many options that can meet your taste and style.
Let’s DIY! Since the wood is so beautiful itself, we wanted to simply stain the wood to match its natural state. Here Richard is using a Minwax stain in natural color and applying it with a foam brush. Make sure you always paint in the direction of the natural wood grain. You can also apply a butcher block oil that is safe for food contact if you’re putting food directly onto your board. I usually put some kind of parchment paper underneath, regardless of which board I’m using.
Once our board is finished drying, Richard is going to put on a couple of cute handles on the sides to make this more of a serving tray. This will make it easy to carry and again this is personal preference, but most craft stores or local hardware stores have handles that you can apply simply with a drill to any board you create. While this board dries, let me show you another fun example.
Let’s take this round pre cut board and paint it with chalk paint. First I’m going to spray my board with a spray primer. Its not necessary, but I have found when working with chalk paint using a primer is helpful. Then, I will put on 2-3 layers of chalk paint making sure to let it cure in between each coat. Once this is dry you will have a fun way to label what food is going onto your board, say specific cheeses, so that people will know what they are sampling. I’ve seen a lot of people do this, and it’s easy to create yourself by painting any surface with chalkboard paint. I will also be adding handles to this board as well. And just like that, we have a beautiful serving tray for our upcoming hosting event.
Now, lets get back to the wooden valentines board. For the fun part, we are now going to decorate the board with our favorite candies. For this board I went for all the red white and pink candy and I’m going to display them with a a few dishes and cookie cutters with the theme of valentines in mind. Here you can see how I’m grouping together, the different candies and creating a full board of a lot of goodness and color. And once this is finished calling in all the troops is the easy part and we all too can enjoy a wonderful Valentine’s Day treat together with even more meaning because we made it together.
It was wonderful to share with you all and introduce my family and to be a part of the great American community today. I hope to see you all again soon. Please be sure to share your charcuterie boards with me by tagging me on my social media platforms and get to know our family more @crateandCottage on TikTok Instagram and my blog www.crateandcottage.com Have a beautiful loving Valentine’s Day!
Comments 
Add comment...
TV app


Mobile app


Connect with us :


